Posts

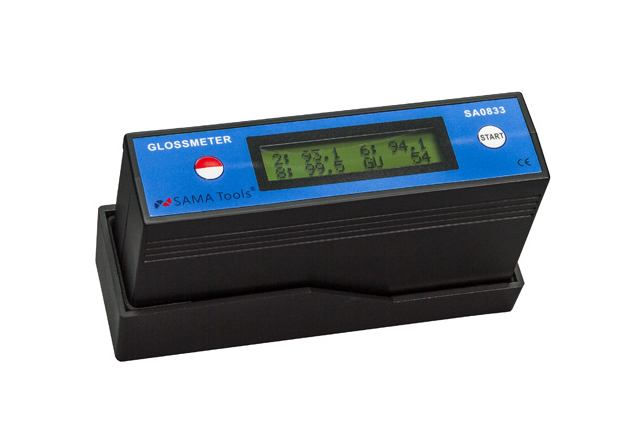
The glossmeter is a tool used to measure the shine and gloss of surfaces. Before reading about why to choose the three-angle glossmeter for painted and polished surfaces, let’s see where it’s mainly used.

Where is the glossmeter used?

The glossmeter is employed in many sectors that work with painted and polished surfaces.  The main industries that use this device are:

  1. Automotive
  2. Furniture manufacturing 
  3. Metal polishing
  4. Industrial painting

In general, the glossmeter is used in any area where the surfaces must be high quality and meet specific standards of shine and gloss.

How does the glossmeter work?

The glossmeter releases a beam of light on the object’s outer surface and measures the intensity of the reflected light. Based on this principle, the glossmeter can determine the degree of gloss of the surface.  We’ve already written an article on the physical principles of the glossmeter, which you can read about.

There are several types of glossmeters, each of which is designed to obtain precise measurements based on the detection geometry and the degree of gloss of the surface. For example, some are equipped with three measuring angles, which allow accurate measurements regardless of the degree of gloss of the surface.

The SAMA Tools three-angle glossmeter is ideal for painted and polished surfaces

The SAGT526 high range tri-angle glossmeter by SAMA Tools is an indispensable tool for those who work in the painted and polished surfaces industries. Thanks to its three measuring angles, this glossmeter allows you to obtain precise and reliable measurements regardless of the degree of gloss of the surface.

As already mentioned,  this tool is designed to measure the gloss of a surface without damaging it, which makes it ideal for use in a wide range of industries. With an extended measuring range, automatic calibration and high accuracy, this instrument is one of the most professional available on the market.

One of the main advantages is its ability to provide reliable and reproducible results. This is particularly important in fields like the automotive industry, where vehicle surfaces must be high quality and meet the high shine and gloss standards set by car manufacturers.
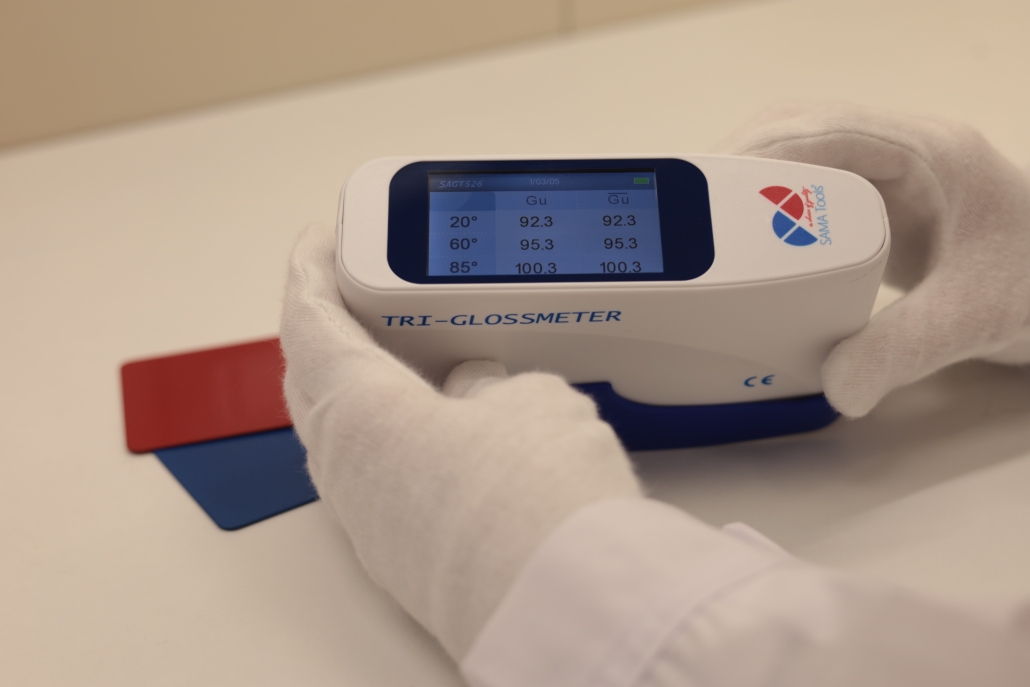
Tri-angle Glossmeter for measuring shine and gloss


Why buy a SAMA Tools glossmeter?

There are several reasons why buying a SAMA Tools glossmeter is a good idea for quality control in any company. Here are a few:

  1. Precision: The glossmeter provides precise and reliable measurements of surface gloss.
  2. Repeatability: The glossmeter provides repeatable results, so consistent results can be achieved for every measurement. This is very important to ensure the quality of the products.
  3. Non-destructive: It’s a non-destructive instrument, so it doesn’t damage the surface during the measurement. This makes it ideal for surfaces that cannot be damaged during quality control.
  4. Easy to use: It’s an easy tool to use and has a digital display that makes reading the results clear and simple.
  5. SAMA Tools Guarantee: Thanks to the numerous positive reviews we’ve recieved, you can be sure you’re making a quality purchase.

High range tri angle glossmeter Video

Why should you calibrate your glossmeter?

The calibration of the glossmeter can be seen as a “snapshot” of the state in which the device is at that particular moment in time.  It provides information about the accuracy and reliability of the instrument, as well as revealing any problems or defects that could affect its ability to provide accurate results. Furthermore, it can be used as a reference to evaluate the evolution of the instrument over time and verify whether it is still able to provide reliable results.

Therefore, it’s important to calibrate the glossmeter because this important process allows one to check the operating status of the instrument and ensure its accuracy and reliability.

What are the risks associated with using an uncalibrated instrument?

Not performing periodic calibrations, may result in inaccurate readings that could affect business decisions or the quality of the finished product. Furthermore, calibration is important to ensure that the instrument always delivers accurate results, regardless of whether it hasn’t been used for a long period of time or if it’s been subjected to harsh environmental conditions.

Secondly, calibrating the glossmeter can help to identify any problems or defects that the instrument may have, which, once resolved by means of fine-tuning, allow to obtain reliable results again.

Calibration banner

In conclusion, purchasing a glossmeter for quality control can be a good idea for the many industries that work with painted and polished surfaces. The glossmeter offers accuracy, repeatability, non-destructiveness and is easy to use, making it an ideal tool for ensuring the quality of surfaces.

If you’ve enjoyed reading about the glossmeter, we think might be interested in reading about measuring color and brightness.

Don’t hesitate to contact our team of experts for more information and fill out the form.   S.A.M.A. Italia can help your company ensure the high quality of your product surfaces, and the calibration of your equipment.

The difference between gloss and brightness is that gloss is (uncountable) a surface shine or luster/lustre, while brightness is the quality of being bright.

The glossmeter performs measurement on flat surfaces and operate like a refractometer.
Gloss and brightness of a particular surface is measured in “Gloss” and it is an optical property, based on the relationship between light and the physical characteristics of the surface, which means the surface capacity to reflect light in a specular way.

Gloss importance

Brightness is one of the most important parameters of a surface, because it can alter the perception of profiles and shapes, influencing the visual experience.

Brightness acts on the surfaces according to different aspects: angle of incidence of light, observer position, physical properties of surface and observation conditions.

This parameter plays a key role in several production sectors where metrological instruments are relevant in order to standardise the quality control.

Brightness measurement was consolidated according to international methods approved by ASTM, DIN e ISO.

Basic physical principle for gloss measurement

When a light source radiates a surface undergoes a double effect: partly dispersed, partly reflected with opposite angle but with equal amplitude, with respect to the initial radiation.

The brightness of a surface is calculated according to this specular reflection.

This last element determines the gloss level of a surface.

Specular reflection intensity is determined by the material and angle of incidence of the illuminating measured according to certain conditions.

Measurement scale

Values are conventionally expressed in units of gloss (GU : gloss units) and they refer to a scale based on the index of refraction of a black glass mirror with a reflection 100GU in relation to a specific angle.

All non-metallic materials, such as paints or plastics, can have a value associated to this data, while for highly reflective metal surfaces, such as laminates and other crude materials, the user can measure get up to 2000GU.

Geometry Types – When and Which one to Choose?

Gloss meters are divided into two types, mono-angle (60°) and tri – angle (20°/60°/85°).

To have more angular references of the illuminant allows improving measurement accuracy according to the level of brightness of the surface.


• Measurements at 20° are more indicated for very bright surfaces;
• Measurements at 60° are more indicated for medium bright surfaces;
• Measurements at 85° allow to obtain optimized values for little bright surfaces.

60° geometry is widely used thanks to its range of median use, however it is recommended to refer to 20° value for measurements above the 70GU, while 85° is preferred for measurements under 10GU.

Example: Measurement of the specular brightness of a painting film

The moment we are going to paint a wall, we need to decide even about the finish: matt, satin or glossy?

Colour can change according to the brightness grade.

EN ISO 2813 provides for the use of the gloss meter to measure the mirror brightness of a painting film.

Caparol Media, the web portal for colour, decoration, isolation and restoration, shows us in 5 steps how to make measurements.


1. Prepare the sample to be measured by applying a paint film and let it dry at 23°C and with 50 % UR;
2. Wait 16 hours for conditioning at constant temperature and RH rate;
3. Calibrate the gloss meter
4. Repeat the measurement six times in different positions, in a parallel and perpendicular direction to the drafting of the film;
5. Calculate the average of measured values and identify the reference ranges.


Upon request, we can carry out calibration report on the whole instrument or on the different angles (20°-60°-85°).

Which are the 5 strength points of the 3 angles digital glossmeter by Sama Tools?

  • Attractive design
  • Compact size
  • Three-angle geometry of the lamp
  • High-precision
  • Ideal for quality control on production line or in the field

Thanks to the master supplied with the instrument, calibration could be performed in few seconds.

The 3 detection geometries, respectively 20°, 60° and 85° allow maximum flexibility of use, covering low, medium and high brightness surfaces.


Glossmeter applications:

– Brightness measurement of ink, paints, sealing wax prints.
– Cladding and processed wood products
– Decorative building materials: marble, granite, glass, glass blocks, etc.
– Plastics or papers

Who was the inventor of the glossmeter?

According to Wikipedia, the first one who realize an instrument for brightness measurement (of paper) was Ingersoill in 1914.

The “Glarimeter” (as it was initially called), was based on the principle that light was polarized in a specular way.

The light was incident at an angle of 57.5 ° and employed a contrast method to subtract the specular component from the reflected light with a polarizing element.